I am having the opportunity to try (and review) "My Garden Post", a vertical gardening system. Not only can it fit in a small area, but if you purchase the drip irrigation system with it, it will help you with your watering. When you find the right drip/watering (time/frequency) setting for your system, it can be one less thing in the garden you have to worry about. It was easy to put together, and has held well in heavy rain and wind (although in a REALLY bad wind, I would secure it just as you would any other free standing entity in the yard). It is also pretty easy to move from one spot to another, even on an outdoor brick patio, with filled pots.
It was very easy to assemble and except for one point, which will be pointed out in the photos, one person could do it by themselves, and even at the point of slight difficulty, one person could figure out how to manage.
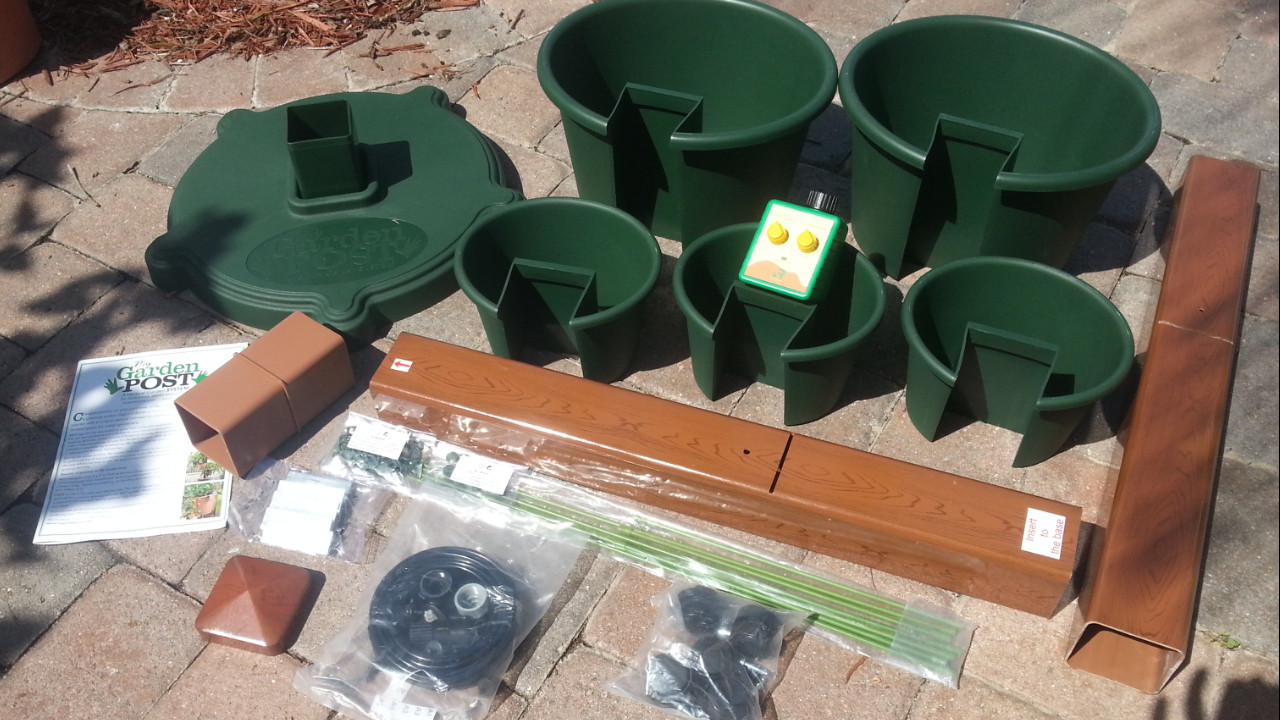
Take a look at the pictures, from start to finish. I have posted captions to help describe what is going on, although it is all pretty much self explanatory. (Note that I had help only so that I could take the photos....Thanks Dad!)
Here is how the "My Garden Post" shipped. Nice, sturdy box with handles on the sides for easier caring. I didn't see who shipped, but I believe it was UPS.
The contents of the box, all laid out. It looks a bit more complicated than it really is, so don't worry if you are "assembly challenged".
First, I had to put the wheels on the base. The wheels were a bit hard to push in, so if you have problems with your hands, you may need someone else to do this for you. One wheel has a wheel lock.
Next, we need to pull out the parts for the post assembly and cut the enclosed tubing to the required lengths (if you have the drip irrigation). All the lengths are given to you in the manual, and the tubing is easy to cut with a sharp knife. And you get plenty. The roll in the upper left corner was what I had left, so there is some room for error.
Next, you need to thread each tube through the corresponding holes in the post. This is all quite clear in the manual. However, this is also the point where you may need an extra hand for a few minutes, so that one can pull the tubes through while one pushes them in through each opening.
Next, we put the post together. You can see where the drip tubes are located.
The post is now inserted into the base with all of the tubing coming through the bottom of the base. The tubing is then threaded into the little notches that will hold them in place. They snap in easily.
The mounted post with drip tubes and the hangars added which will hold the plant containers.
Attaching the pots to the post.
The completed post! And did you notice that, except for the knife to cut the tubing, no tools were required!
I have begun to moderately fill the pots. The top pot will be packed further, the second from the top is loaded with lettuce and basil seeds that are sprouting like crazy. I have put in tomatoes, eggplant, peppers, kale, oregano, chives, cilantro, nasturtiums, globe basil, strawberries and more to be decided as a few of the pots grow a bit more and I see what I have in space. You really can pack these!
Well, that is my experience so far with the "My Garden Post" vertical gardening system. The only thing that I don't have hooked up yet is the drip system, as I need to figure out how I want to hook it up with the other hoses and Y's. It does work, however, as I did unhook one of my hoses and hooked this up to see what happened. So for now, I hand water.
Although I put all edibles in my set, you can put in decoratives as well. All in all, if you have not much space, this could be a great solution for you. It is also is a great solution for those with physical limitations.
If you're interested in the "My Garden Post" system, just hit my affiliate button on the right side of the page. And if you decide to buy, you'll get a discount (using either the button or my code).
Have Fun!


No comments:
Post a Comment